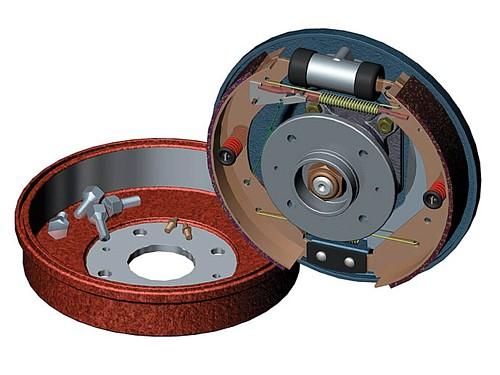
 REAR DRUM BRAKE – Replacing the brake shoes
Repair of rear axle drum brakes is limited to replacing the brake shoes (or friction linings), rolling out or replacing the drum and for adjustment.
■ Remove the rear wheels and unscrew the emergency brake adjusting screw.
■ Undo the two bolts securing the brake drum and remove it with a puller.
■ Check, that the brake shoes are not oiled up, as this would indicate a leak in the cylinder.
■ Unhook the upper and lower tension springs. The upper spring is longer than the lower one.
■ Press in and turn the guide plate by 90 °. Do the same with the other jaw.
■ Remove the brake shoes.
The thickness of the friction linings must not be less than 1,5 mm. To check, for worn or damaged elements of the jaw self-adjusting mechanism. If the drum has deep scratches or has become oval due to wear, it should be rolled over. The permissible diameter enlargement is 0.8 mm (0,4 mm per side), thus, after machining, the diameter of the drum must not exceed 186.83 mm. Diameter drum 187 mm must already be replaced. After replacement, the jaws must be machined to the drum diameter reduced by 0,3 mm.
Install the brake shoes in the reverse order. The cylinder pistons should be moved back a little.
■ On cars with engines 900. 1100, 1300 slide the self-adjusting pins towards the jaws, which will facilitate the assembly of the drum. After screwing the drum, press the brake pedal several times, causing the jaws to return to their starting position.
■ On cars with engines 1300 D i 1700 D Attach the brake drum and turn the eccentrics of the self-adjusting mechanism, that the drum rubs lightly against the jaws. Then unscrew both eccentrics by the same angle.
Final adjustment is made after putting the wheels on, so that the pedal travel is not too great, and the turning wheels offered the same resistance, as if the emergency brake lever is applied to 2. clove. The wheels must turn freely when the lever is released.